公告:
公告是一个非常典型的示例,使用到Zhiqim Framework基础模板(微内核、数据库映射、模板引擎、WEB容器和前端UI),下面分步骤介绍如何使用Zhiqim Studio、MySQL和ZhiqimManager组件编写一个公告工程。
公告功能描述
1、公告列表(/announcement.htm),分页显示公告列表,显示公告类型,公告标题,发布人,发布时间,已读/未读。
2、增加公告(/announcementAdd.htm),填写公告信息,前后端表单验证和数据库访问,同时使用WebSocket推送给操作员。
3、公告内容(/annContent.htm),显示公告详细内容,操作员查看后公告列表该公告变为已读。
4、公告回收站(/annRecylebin.htm),分页显示被回收公告。可对回收公告进行还原、删除操作。
5、操作员阅读公告列表(/read.htm),显示阅读该公告的操作员信息,提供模糊查询操作员功能。
一、组件下载
| 打开知启蒙官网,下载--组件资源下载,在组件中选中ZhiqimManager下载该组件。 |

|
二、组件添加
|
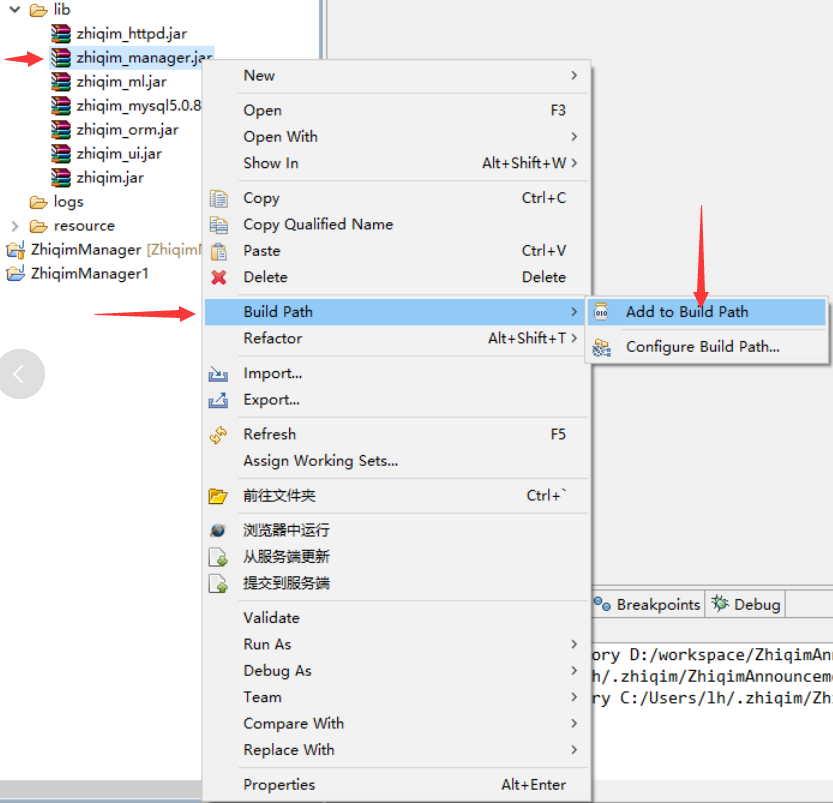
|
三、组件配置
| 在目录下打开conf中context.xml文件添加配置。 |
| <?xml version="1.0" encoding="UTF-8"?> <!DOCTYPE ZHIQIM-CONTEXT PUBLIC "-//ZHIQIM //DTD Zhiqim-Context Configuration 1.4.0//EN" "http://zhiqim.zhiqim.com/dtd/zhiqim_context_1_3_0.dtd"> </zhiqim-context> <!-- 组件配置 --> <component name="管理台组件" path="/org/zhiqim/manager/resource/" /> </zhiqim-context> |
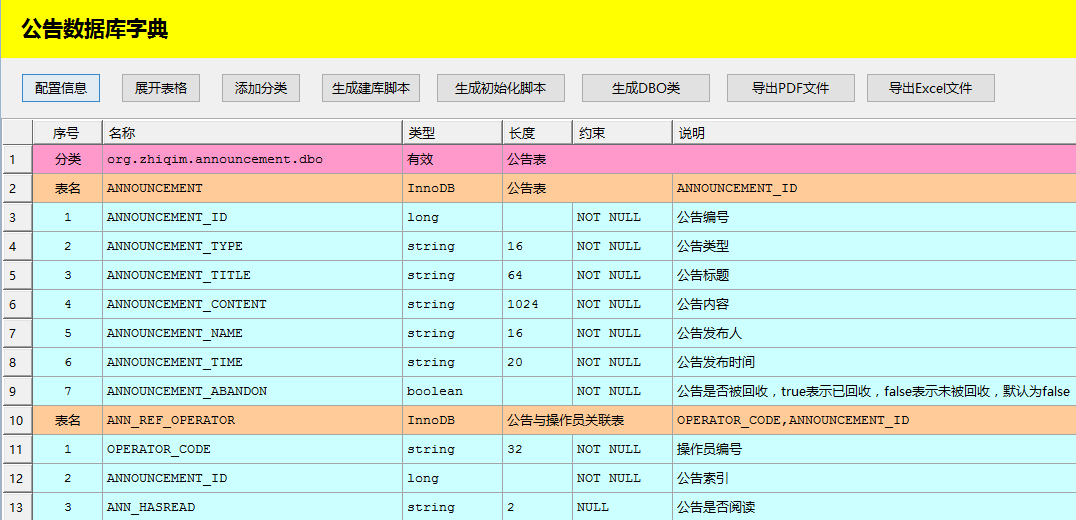
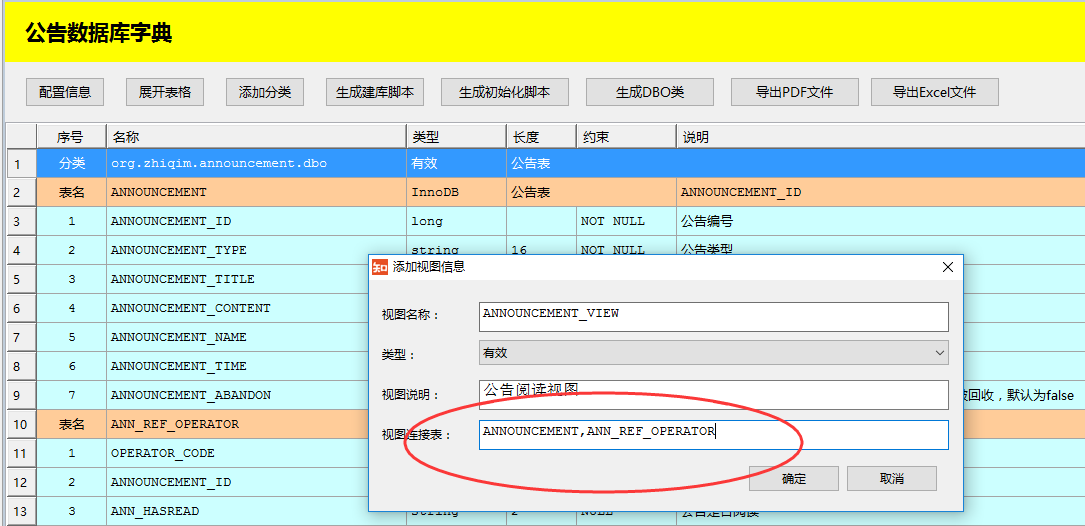
四、添加公告视图(通过/document/留言本数据库字典.dbo设计)
| 一、创建公告表和公告操作员关联表,建立两张表的视图(视图连接的表可以为多个,用逗号隔开,如果需要和操作员表连接可以建立一张临时操作员表,避免生成DBO类): | ||
|
 |
|
| 二、添加视图连接:连接有三种方式(EQUAL表示内连接,LEFT表示左外连接,RIGHT表示右外连接) | ||

|
||
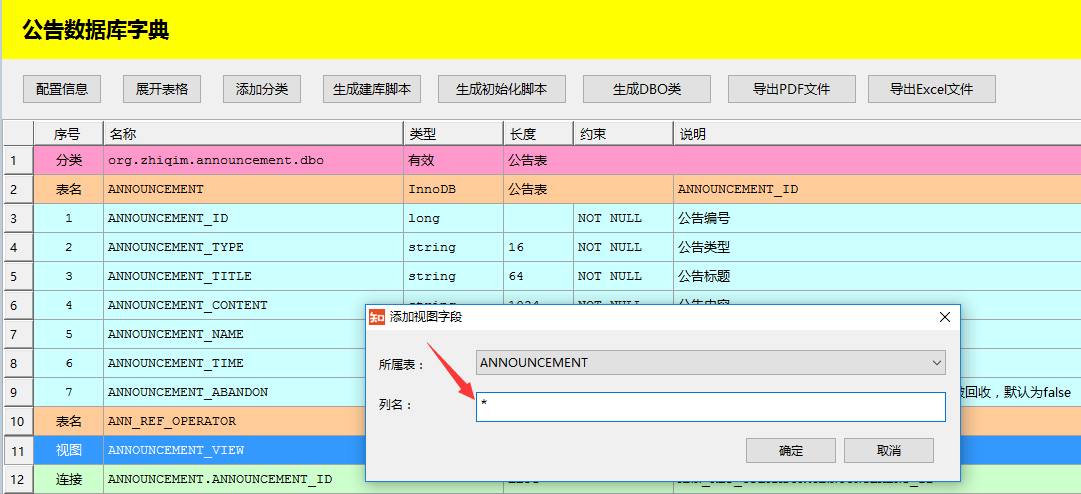
| 三、添加视图字段(选中视图,右键添加字段): | ||
|
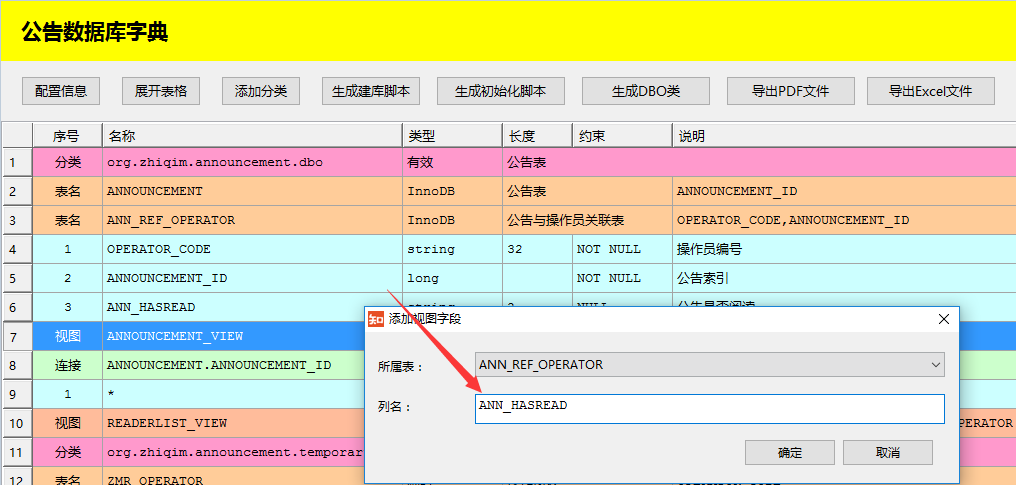 |
|
| 四、配置和生成DBO(如图在dbo源码包中生成DBO类): | ||
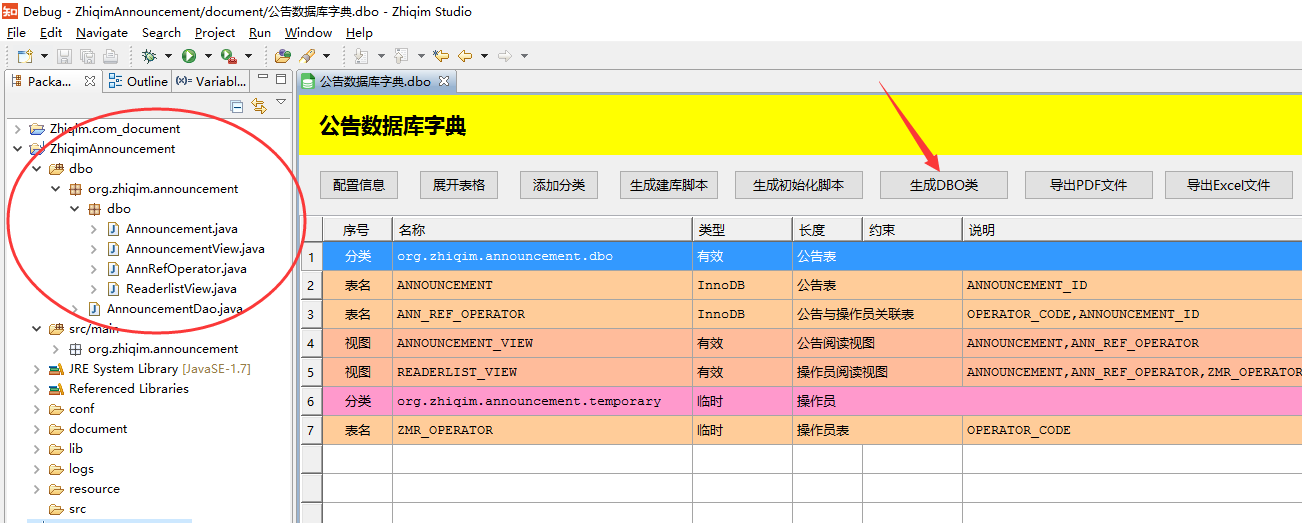
|
||
五、添加公告功能菜单
| 一、选中系统根菜单右键添加下级菜单办公,在办公下添加下级菜单公告填写好URL,生成菜单脚本: | |

|
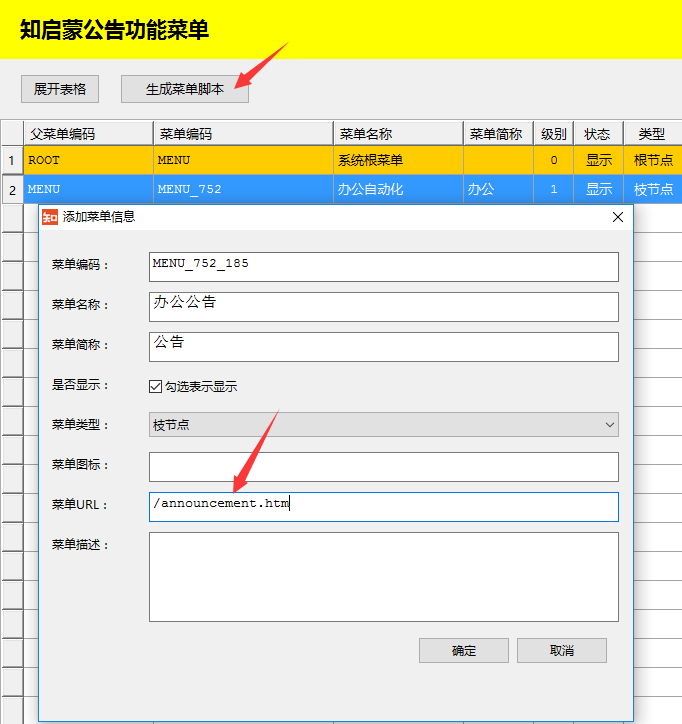 |
六、组件效果展示
| 一、输入127.0.0.1网址并登录,运行后即可展示组件效果(见下图) |
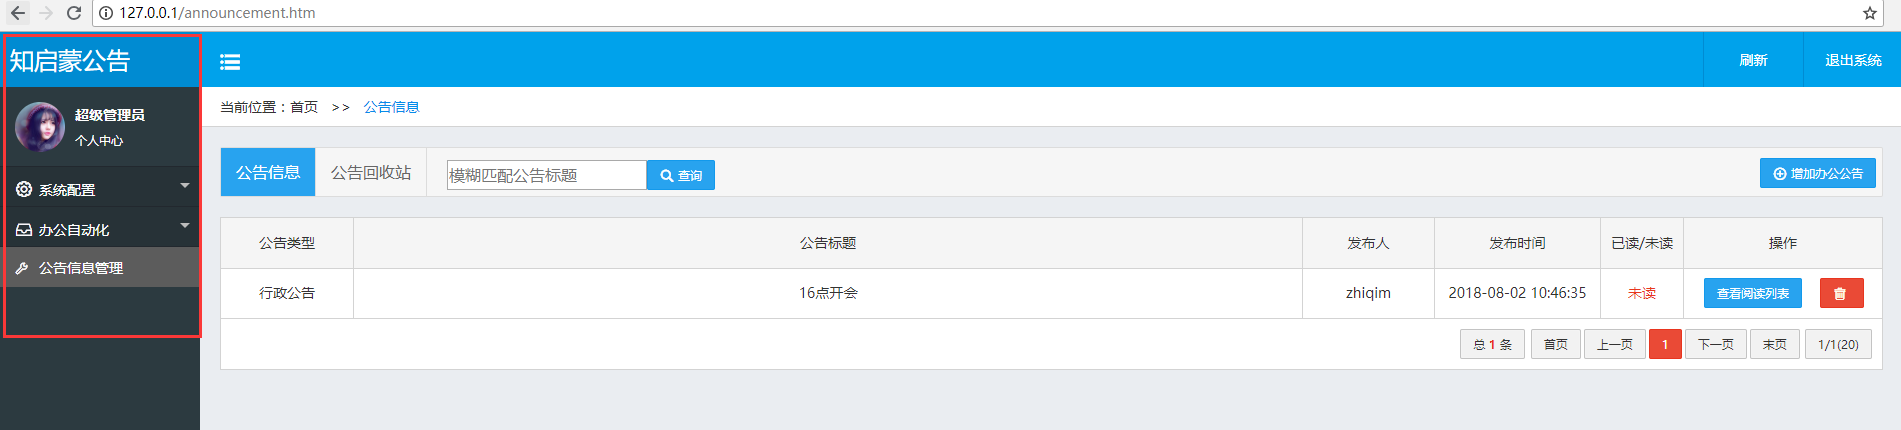
|
七、编写Action(以添加公告/announcementAdd.htm设计为例写一个Action,带有WebSocket功能)
| 一、Action配置(/resource/conf/context.xml): |
| <action name="增加公告" interceptor="chkZmrLogin" path="announcementAdd.htm" template="/ztmpl/zhiqimManager/template.htm" include="/zview/announcementAdd.zml" redirect="/announcement.htm" class="org.zhiqim.announcement.action.AnnouncementAddAction"/> |
| 二、编写Action类(org.zhiqim.announcement.action.AnnouncementAddAction): |
|
public class AnnouncementAddAction extends GetPostAction
{
protected void validate(HttpRequest request)
{
request.addValidate(new IsLen("announcementTitle", "标题不能为空且不超过64个字符", 1, 64));
request.addValidate(new IsLen("announcementType", "类型不能为空", 1, 16));
request.addValidate(new IsLen("announcementContent", "内容不能为空且不超过1024个字符", 1, 1024));
}
protected void doGet(HttpRequest request) throws Exception
{
}
protected void doPost(HttpRequest request) throws Exception
{
String title = request.getParameter("announcementTitle");
String type = request.getParameter("announcementType");
String content = request.getParameter("announcementContent");
String name = request.getSessionName();
String time = DateTimes.getDateTimeString();
Announcement announcement = new Announcement();
announcement.setAnnouncementId(Ids.longId());
announcement.setAnnouncementTitle(title);
announcement.setAnnouncementType(type);
announcement.setAnnouncementContent(content);
announcement.setAnnouncementName(name);
announcement.setAnnouncementTime(time);
ORM.table().insert(announcement);
//对所有连上来的WebSocket进行消息推送
HttpSessionManager manage = request.getContext().getSessionManager();
PageResult |
| 三、编写zml文件(resource/zview/announcementAdd.zml): |
| <table class="z-table z-bordered z-bg-white z-pd10 z-px14"> <tr class="z-h40"> <td colspan="2" class="z-bg-gray z-bold">增加公告</td> </tr> <tr class="z-h40"> <td width="40%"><span>公告标题:<span class="z-color-999">(公告标题不能为空,[1,64]范围)</span></span></td> <td width="60%"><input name="announcementTitle" class="z-h30 z-w300"><span class="z-text-red"> *</span></td> </tr> <tr class="z-h40"> <td width="40%">公告类型:<span class="z-color-999">(请选择)</span></td> <td width="60%"> <select name="announcementType" class="z-h30 z-w300" > <option >行政公告</option> <option >假日公告</option> <option >会议公告</option> <option >其他</option> </select> <span class="z-text-red"> *</span> </td> </tr> <tr class="z-h400"> <td colspan="2"> <span>公告内容:<span class="z-color-999">(公告内容不能为空且不超过1024个字符)<span class="z-text-red">*</span></span></span> <textarea name="announcementContent" class="z-w100p z-h300 z-mg-t20"></textarea> </td> </tr> <tr class="z-h80"> <td colspan="2"> <a href="/announcement.htm" style="margin-right:600px;">返回上一页</a> <button class="z-button z-large z-blue z-w150">提交</button> </td> </tr> </table> |
| 四、编写context.zml文件(WebSocket示例): |
| <#--左边区域自定义块--> <#function zhiqim_manager_topnav_left_defined()> ${zhiqim_announcement_onload()} </#function> <#--公告加载--> <#function zhiqim_announcement_onload()> <script> Z.onload(function() { //1.首次登录如果有公告的,要求立即提醒 <#if sessionUser.getValue("announcement_close") != "true" && AnnouncementDao.hasNotReadAnn(request)> top.Z.alert("有未读的公告,请进入阅读,谢谢!", doClose); </#if> //2.建立WS,新公告时提醒 var ws = new WebSocket("ws://"+location.hostname+":"+location.port+"/service/ws", "announcement"); ws.onopen = function(){console.log("ws.onopen");}; ws.onclose = function(e){console.log("ws.onclose");}; ws.onerror = function(e){console.log("ws.onerror");}; ws.onmessage = function(e){console.log("ws.onmessage:"+e.data);if (e.data == "announcement_new"){top.Z.alert("有新的公告发布,请在方便的时候进入阅读,谢谢!",doClose);}}; }); function doClose() { var ajax = new Z.Ajax(); ajax.setClassName("sessionUser"); ajax.setMethodName("setValue"); ajax.addParam("announcement_close") ajax.addParam("true"); ajax.setSuccess(function(){Z.L.href("/announcement.htm", window.mainFrame);}); ajax.execute(); } </script> </#function> |
八、公告调试
|
配置调试信息
单步调试IndexAction
|
<-- debug配置 -->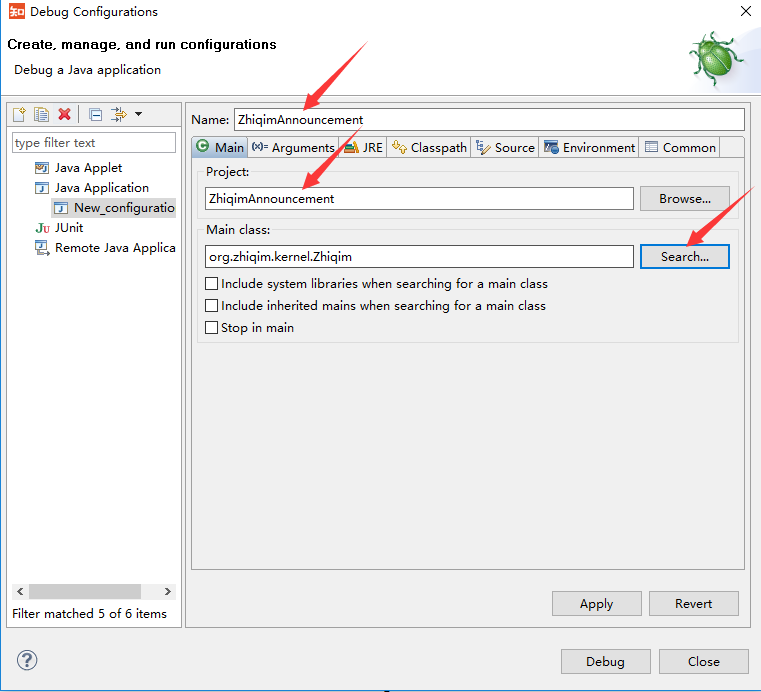 <-- debug状态 --> 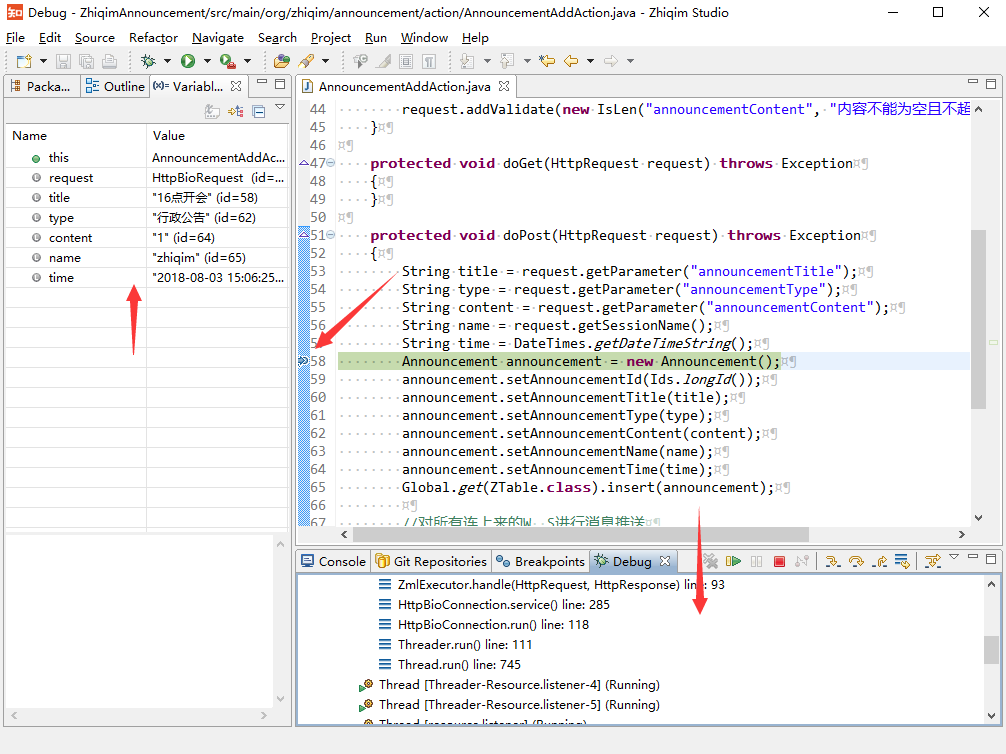 |
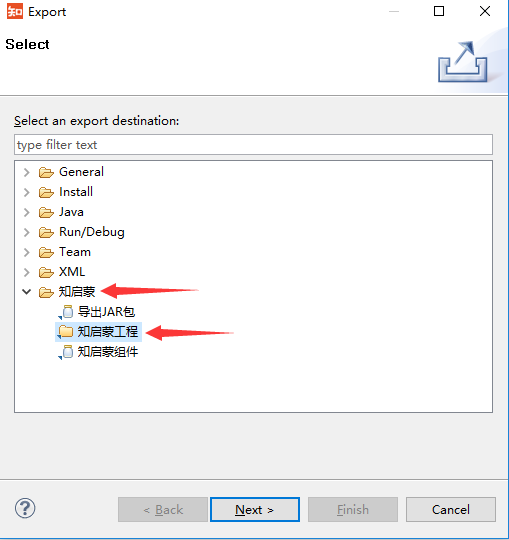
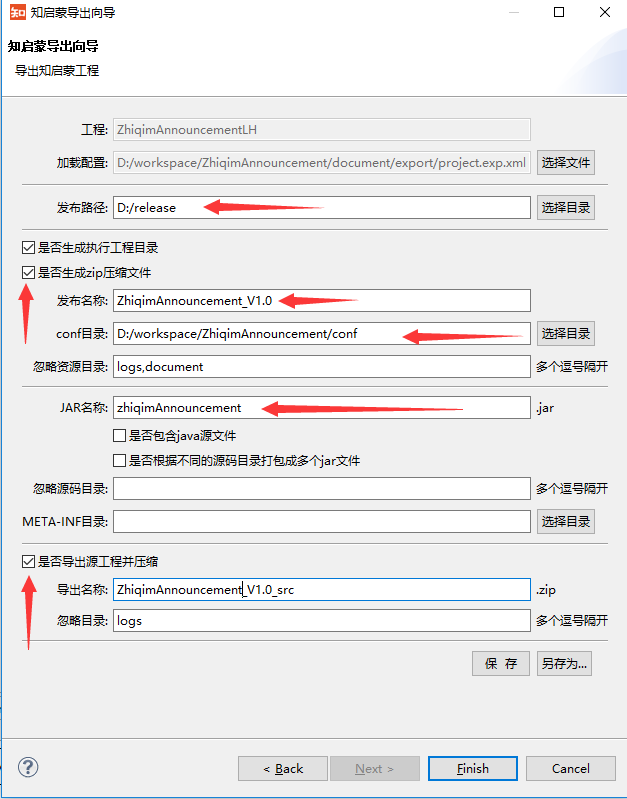
九、公告发布(导出执行程序和工程源码打包)
|
|
|
 |
十、公告运行(Windows和Linux)
|
配置[/conf/zhiqim.xml]文件
Windows运行
Linux运行
|
<-- Windows下运行 --> <-- Linux下运行 --> 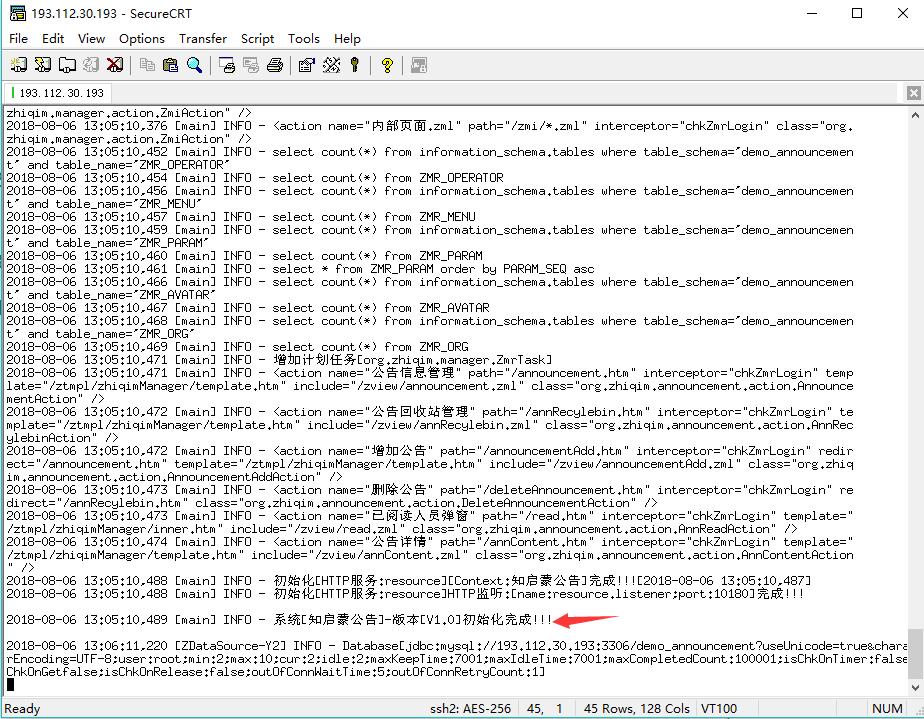 |